For someone who grew up in the Rockies, I wasn’t all that bright on my first few trips to the backcountry. One trip, in my mid-teens, had me all but convinced I’d give up backpacking for good.
I’d packed the necessary items—a tent, sleeping bag, extra clothes, and fishing tackle—but what I’d loaded up on was food. I hated every step of that hike because of its weight and the real irony here is that I didn’t even eat half of what I’d brought.
I got even more upset when we made camp and I saw my buddy’s pack empty. His tent stood erect, sleeping bag rolled out, and fishing tackle leaned carefully against a tree. When I asked where his food was, he shrugged and said, "in the lake.”
To make a long story short, I learned a lot on that trip. Most importantly, though, I learned smoke fish in the backcountry with nothing more than a roll of tin foil.
Getting Started
To make this cooking style work, you need a few basic items to start:
- A working knowledge of plant life wherever you've ventured into the wild. In this case, we've wandered into the backcountry of the aforementioned Rocky Mountains.
- A sharp knife
- Tin foil
Why do you need knowledge of plant life? Well, instead of lugging around seasonings that add weight to your pack (and attract bears) you can use wild plants to add flavor to your dinner.
Sage and pine are my preferred plants because they’re so readily available in almost all of the American West. Wild sage is different from sagebrush, and that’s an important distinction to make.
Sagebrush is a completely different species than wild sage—Artemisia vs Salvia, respectively. Artemisia is toxic to all mammals except pronghorn. So don’t eat that one.
Instead, look for wild sage—Salvia. This plant is a member of the mint family and perfectly safe to eat. It does vary in appearance, though the general aspects are as follows:
- The leaves are covered with fine, soft hairs
- The flowers are generally lavender, though they do occur in white, purple, or pink
- Leaves are grey-green on the front and almost entirely white on the back
This plant is very common across the Rockies and throughout most of the contiguous United States. You can see where it grows in your state thanks to this handy tool from the United States Department of Agriculture.
I hope identifying pine is self-explanatory, though it’s worth noting that you don’t want to use pine nuts. I’ve tried it, and it’s just not worth the effort.
Once you have your plants and tin foil, it’s time to get your fire ready to cook.
Preparation
Build a fire big enough to provide coals that’ll cook your fish. Start with a solid tinder base and tiny sticks, as pictured below.

Once the flames are going, add bigger sticks and tree limbs to quickly create a smoldering pile of wood that’ll quickly devolve to embers.
While the fire burns down to coals, gut your fish and set it aside. You’ll then need to gather the following materials:
- Enough sticks, about medium-sized, to create a grill-like surface on which you’ll directly place the trout
- Enough tinfoil to wrap around your bundle of plants and herbs, completely enclosing it
- Enough tinfoil to spread over the top of your “stick grill” to help retain heat
- Sticks to support the tinfoil used to retain heat from your fire
Once you have everything in place and the fire’s nearly to coals, you’re ready to start cooking.
Cooking
Wrap your plants in tinfoil and enclose them completely. Then, with your knife, cut slits in both sides of the tin foil. This allows heat in quicker and controls the flow of smoke from the top. In these photos I used only pine because it pairs well with tiger trout.

Place the tinfoil-wrapped plants on the fire, then grab the medium-size sticks you gathered earlier. It’s time to make your “grill.”
Place the sticks in a fairly even pattern across the top of the tinfoil-wrapped plants, trying to make a good even surface. Your fish will sit right on these logs.
The fish fits on the “grill” rather well, I think.

Now, the fish will cook this way but it’ll take forever. You’d need tons of coals to get a hot enough base to cook trout open-face on a grill like this.
That’s where the rest of your sticks and tin foil come into play.
Arrange the sticks around the fire in such a way that they’ll support enough tin foil to cover your entire grill area. Then, place the tin foil on the sticks. I like to stab the sticks through, then wad the foil up tight on the stick. It doesn’t slide too much that way.
Your end product should look something like this:

Now all you do is sit back and wait. Fish cooks fairly quickly, but this method takes about 20-30 minutes, depending on how hot your coals are and the size of your trout. You’ll notice, as the fish cooks, the smoke wafting up from your tinfoil-wrapped plants. That’s natural seasoning at its finest.
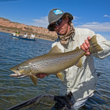
The meat should look either straight white (if you caught a pale-fleshed trout) or a dull orange, like this tiger trout:
Now comes the easy part. Pull the trout off the grill, grab the tinfoil you used to keep the heat and smoke in, and eat right off the bone.
I love this method of cooking fish because it’s so simple and requires nothing else in my pack except a relatively light roll of tinfoil. The taste is very earthy, like a strong woodbark tea, though it’s good.
If you’ve never smoked trout this way, I suggest giving it a shot.
That’s all there is to this bare-bones approach to cooking trout in the backcountry. It’s served me well all these years, and as long as I have public land, wild plants, and wild fish, it’ll continue to do so for generations to come.













Comments
Buddy H. Atwell replied on Permalink
Very interesting and useful article. Good photography. Link to book that would help identify plants, might be helpful. Buddy
Fred replied on Permalink
I am going to add to your way of smoking and cooking trout in the back country. I am originally from that uber leftist state, Californication. I was an outdoor guide for several years. big "dog and pony" show for "rich people". the most useful part of my pack was this 18" X 12" piece of 18 gauge sheet metal that no one knew what it was for. it re-enforced my frame of my backpack and was perfect to cook trout or small salmon (kokanee). the support was dished slightly, it would hold a small bit of oil, herbs, and juice. this combined with a small amount of foil would make a great poaching/cooking vassal for most every fish I caught. trout of all kinds, small salmon, bass, perch, crappy, blue gill/sun fish, and some catfish. yes, I had a little extra supplies with me, but, the cooking was still as basic as I could make it with as few supplies/food pack in in order to keep the horses and footprint to a minimum. when no oil, or fruit juice were available: I would use the stick method over a bed of coals wrapped in herbs and corn husk that we always had after hucking corn for the customers. this method I am told works for venison, rabbit, birds, and frogs.. but I would know personally.
Pages