.")
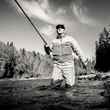
In order to be successful in any setting or locale, every photographer needs to be organized, thoughtful and have a plan in place for contingencies and situations that arise in the field. When working underwater, these needs are magnified thanks to the added gear, instrumentation and increased complexity introduced by the underwater environment and its interplay with the world above. Taking these unique considerations into account when planning your shoot -- from start to finish -- will maximize your chances of walking away with the goods.
This handful of tips should help you do just that.
Properly storing and traveling with your gear
The first step in any shoot is safely getting your gear to location. Due to the bulky nature of underwater equipment, this can cause potential problems when traveling by air. I have been asked by many other photographers how I travel with underwater photography equipment, so I thought I would share what has worked for me these past few years.
My gear
Canon 5D Mark III
Canon 16-35 f/2.8L
Aquatech Elite 5D3 Sport Housing
PD-85 Lens Port (dome)
PD-145 Lens Port (for 24-70 f/2.8)
P-70 Extension Ring
Most would think the obvious solution to packing this gear would be in a Pelican Case, which is certainly a viable option and is one chosen by many photographers. My beef with this, however, is that you have to check the Pelican case, risking the element of human error and the potential of theft. I make it a priority to always have as much of my gear with me (carry on) when traveling. Also, Pelican cases and the like are heavy, which doesn’t help an already heavy situation.
The solution I have utilized for the past 6 years has never let me down and will allow you to travel anywhere, always having your gear by your side. It all comes down to one perfect bag, the Patagonia Great Divider. This bag is perfect because
- it fits all of the gear listed above, plus more
- it is very light
- it was made to fit under all airline seats and also fits in overhead storage
- it is incredibly durable
- it is highly water-resistant (practically waterproof)
I recently received a similar bag from Fishpond that works perfectly as well. This is the Westwater Boat Bag, which just got a great update with water resistant outer material. While you can get away with other options similar to these bags, I've yet to encounter any that are sized in a way to accommodate storage and air travel.
Lastly, I always store my lens ports in 1 gallon zip lock bags to decrease the exposure to dust. Acrylic is a dust magnet.
Auto Focus is your friend
The debate over whether to shoot autofocus versus manual is finally over, at least for me. When I first started shooting underwater I had a pretty old body (Canon 30D) with sloppy, inaccurate auto-focus. The frustrating issue that I continued to run into using an inferior auto-focus system was the camera always focusing on the waterline when framing split shots. I experimented with manual focus, which worked well, but was extremely limiting. I could only shoot at one focus distance (typically 1.5ft), and with a fast moving subject like a fish, my success rate was the same or worse than when using auto-focus.
.")
These days, with a more modern camera like the Canon 5D Mark III and it’s advanced, fast AF system, and quick menu access, AF is certainly the way to go. There will still be misses, but not as many. I can use zone focusing + AI Servo and count on the AF system to do a lot of the heavy lifting. If the water is deep enough to snorkel in, success rates improve even further, as I can see more of what is happening by looking through the camera's viewfinder.
Camera Settings
First and foremost, steer away from auto modes. Manual will give you control and consistency. When I’m setting up my exposure for an underwater situation, my goal is to have both a fast shutter speed to stop motion, and a high aperture value to increase depth of field (unless I want to add an element of separation). This can be tricky because those two requirements will require a lot of light. In certain conditions (i.e. cloudy), ISO settings will have to be bumped up fairly high (full frame body comes in handy here). Taking all of this into account, there are three things that are going to influence your aperture, shutter speed and ISO settings.
- Position of sun and cloud cover
- Structure and color of bottom (if shallow enough)
- Clarity of water
.")
The ideal conditions for shooting underwater are as follows: high mid-day sun, partly cloudy, light colored bottom, and crystal (I mean super super super crystal) clear water. I’m speaking in generalities, here. If you are looking for a particular type of shot, your desired conditions may vary. But, most often, the aforementioned conditions will be the most advantageous to your success, for a variety of reasons.
Position of sun and cloud cover
High, mid-day sun is ideal because your entire scene will be evenly lit and, more importantly, this is the brightest time of day. A partly cloudy day is really only an asset for split shots as the clouds add balance. Like most photographers, I hate boring, blank skies.
Structure and color of bottom
The color of the bottom is a very important factor. For example, a white sand bottom will act as a natural reflector, allowing you to dial in ideal aperture and shutter speed settings without having to crank your ISO. On the contrary, shooting over a flat of turtle grass will only absorb the incoming light instead of reflecting it. In situations where you are shooting in deepwater, you are strictly metering on the subject. If you meter for the entire scene, your fish will likely be blown out due to the reflection of the sun.
.")
Clarity of water
The rule goes: the dirtier the water, the less light. There is also that key element of visibility and, overall, the cleaner the image, the better. If you are blessed with gin clear water, take advantage of it and walk with a plan. Always be aware of what you and your subject are doing so that you minimize kicking up silt or sand. Do not underestimate the importance of walking softly and carefully and pay attention to the direction the stream or tide is flowing. Disturbed sand, silt or vegetation will ruin your images, so take deliberate care to avoid adding them to your scene.
Spit on it
Another annoying part of UW photography are the water drops that will form on the outside of your dome or flat lens port. Whatever you do, don’t use Rain-X or any other hydrophobic product. It will only ruin the acrylic surface. Instead, use your saliva. It’s free and always available! Simply spit as much as you can on the outer surface, rub around with your fingers (the ones without jewelry!) and dip in the water. Your saliva will create a temporary film and leave you with a water drop free image. You will have to repeat this about every thirty seconds.
.")
For best results, I like to sip on soda (if available) before doing this. The acid in soda will help activate your saliva glands into producing a very thick saliva, which will serve as a much better aid than thin saliva.
Underwater Fishing Photography Series
Underwater Fishing Photography: An Introduction
Underwater Fishing Photography: The Gear
Underwater Fishing Photography: Tips for Success
Underwater Fishing Photography: Mastering the Split Shot (coming soon)
.")


.")

.")
.")


.")


.")
Comments